Saturday, October 22, 2011
Craftycorner's: Penguin Ornaments and Snowmen tags
Craftycorner's: Penguin Ornaments and Snowmen tags: Penguin Ornaments: These penguin ornaments were from my stash of Christmas wrapping paper from last year. When I retrieved some of ...
Penguin Ornaments and Snowmen tags
Penguin Ornaments:
These penguin ornaments were from my stash of Christmas wrapping paper from last year. When I retrieved some of my crafts out of the closet I saw the paper and thought how pretty the paper was and it would be stunning as a ornament.
I starting cutting penguins from the paper and had cardboard templates that were rectangular and circular. I glued down the paper on both sides of the cardboard template. I finished with purple glitter on the border on the penguin ornaments and took by hole punch at the top and strung a satin purple ribbon at the top.
Snowmen Tags:
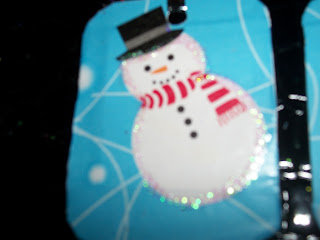
I also had the cutest paper with snowmen and used it for gift tags. I cut several rectangular cardboard templates and glued down snowmen from the paper and smoothed out the paper. I outlined the snowmen with white glitter glue and the other side added some touches of white glitter around the words.
I used my hole punch and added silver curling ribbon for the gift string. I think these would be great for any kids that you have on your gift list.
Wednesday, October 19, 2011
Craftycorner's: Whimsical Wreaths, Large and small
Craftycorner's: Whimsical Wreaths, Large and small: I made these adorable wreaths out of plastic bags, I think it took about 20 bags that I cut into 4" strips that I tied onto wire circles. ...
Whimsical Wreaths, Large and small
I made these adorable wreaths out of plastic bags, I think it took about 20 bags that I cut into 4" strips that I tied onto wire circles. One is a 9" circle and the other one is 12". I added some whimsical ornaments to each. After putting all the plastic strips on, I draped silver cording and made a bow on the top for the large wreath. The additional ornaments are my handmade ornaments that I painted myself and strung them in strategic places on the wreath. For the small wreath I draped green curling ribbon for the bow.
I have been so busy with Christmas crafts this year for some reason. I never had the itch before, I just got the mood to start on crafts this year early and I have alot ideas of what I want to do next. I hope you enjoy my crafts and I welcome any comments you have or any questions you might have on any craft you see.
I have been so busy with Christmas crafts this year for some reason. I never had the itch before, I just got the mood to start on crafts this year early and I have alot ideas of what I want to do next. I hope you enjoy my crafts and I welcome any comments you have or any questions you might have on any craft you see.
Craftycorner's: Adorable Trick or Treat Bags
Craftycorner's: Adorable Trick or Treat Bags: This cute bag was made with felt and embellished with felt pieces that I glued on the bag. I used two squares of orange felt and doubled s...
Craftycorner's: Beautiful Felt Poinsetta's
Craftycorner's: Beautiful Felt Poinsetta's: Words can't describe these felt poinsettas that I made. I keep looking at them and can't believe they are made from felt. I got the printa...
Beautiful Felt Poinsetta's
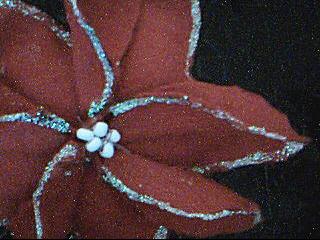
Words can't describe these felt poinsettas that I made. I keep looking at them and can't believe they are made from felt. I got the printable from a site I belong to and cut the petals from the paper. Then I trace them on cardboard to make templates. The leaves on top are curled at the center and seed beads are at the center of the poinsetta.
On the white poinsetta I went around with red glitter glue making a dash pattern on the bigger flower and on the leaves I put the glitter glue on the edges of the curled edges.
On the red poinsetta I lined with silver glitter glue on the border on the leaves and the bigger flower. On the bigger poinsetta I used white tulip puffy paint at the border using a dash pattern at the border.
Tuesday, October 18, 2011
Adorable Trick or Treat Bags
This cute bag was made with felt and embellished with felt pieces that I glued on the bag. I used two squares of orange felt and doubled stitched 3 sides of the two with black thread. Then I took two pieces of black felt and doubled the length and joined them in the middle to make a handle longer. I stitched them in the middle to join them as one. Then at the sides I stitched the handled onto the inside of the bag.
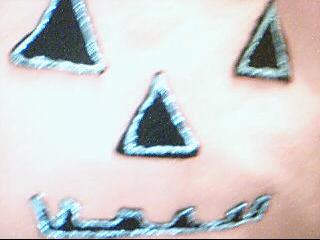
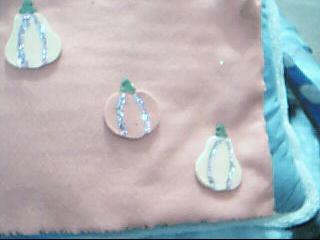
I cut black triangles for the Jack o lantern face on one side. Then I added silver glue glitter at the borders of the felt pieces. This Jack o lantern is ready for Halloween. On the other side I added two felt pears and a pumpkin and added glitter for a sparkly effect and used tacky glue to adhere them on the bag. My granddaughter will be so excited to get this bag for sure.
I cut black triangles for the Jack o lantern face on one side. Then I added silver glue glitter at the borders of the felt pieces. This Jack o lantern is ready for Halloween. On the other side I added two felt pears and a pumpkin and added glitter for a sparkly effect and used tacky glue to adhere them on the bag. My granddaughter will be so excited to get this bag for sure.
Tuesday, September 27, 2011
Craftycorner's: Dancing Ghosts
Craftycorner's: Dancing Ghosts: These cute ghosts were a spontaneous thought when I doing other crafts. The idea that came to me and I just had to do these adorable ghosts...
Dancing Ghosts
These cute ghosts were a spontaneous thought when I doing other crafts. The idea that came to me and I just had to do these adorable ghosts. They are made from coffee filters and twist ties and black marker for the eyes. I took one of the filters and make a ball for the heads for the ghosts and put another filter on top of the heads. Take a twist tie around the neck once and make the arms with the same twist tie. The orange skirt I colored with orange marker and dipped with water so that the water will seep through the filter and when the filter was dry, the skirt was the bottom layer of the one ghosts. With the arms of the ghosts, join them in a semi-circle.
I posted this craft at another site and they published them to their site so that the kids could make them for Halloween. It makes me feel good when others can enjoy and share a craft. I have these dancing ghosts on my bedroom window sill and I have battery operated luminaries that I made for Halloween that glow from the outside.
I posted this craft at another site and they published them to their site so that the kids could make them for Halloween. It makes me feel good when others can enjoy and share a craft. I have these dancing ghosts on my bedroom window sill and I have battery operated luminaries that I made for Halloween that glow from the outside.
Labels:
arms,
black marker,
coffee filters,
dancing,
ghosts,
halloween,
join,
orange,
skirt,
tie,
twist
Saturday, September 10, 2011
Autumn Ribbon Wreath
This colorful autumn wreath was made with curls of amber and mulled wine striped ribbon and mulled wine ribbon around a wreath. Underneath the ribbon is a base of gold ribbon that was wrapped around the wreath form and the satin is shown on the back only. The bow was made with amber and mulled wine striped ribbon.. The curls on the bow is a added touch to this festive wreath.
GLITTER LEAVES AND PUMPKIN WREATH
This colorful fall wreath was made with a cardboard form that I made myself. I added fall leaves from the store and felt pumpkins and pears in orange and yellow. I put the leaves in certain pattern and glued glitter on some of the leaves. I adhered the pears and the pumpkins and I glued some more glitter on the creases on the pumpkins and the pears.
Monday, August 29, 2011
Craftycorner's: I was on hiatus for the summer.....
Craftycorner's: I was on hiatus for the summer.....: I took a loong break during the summer and now I am so ready and eager to do my favorite crafts for fall. I already started som...
I was on hiatus for the summer
I took a loong break and now I am so ready and eager to start my fall crafts. I already started some autumn crafts and I for one am so glad that summer will be over soon,I don't know about anybody else but this summer was a scorcher in the midwest. Reading news stories I think that 80% of the country had experienced the hottest temperatures ever for a season. I am looking for cooler weather and everything that fall brings. So....I have busy the last week decorating my small apartment. Wherever you look the warm colors are apparent; red, oranges, gold, green and brown. I feel warm inside too looking at the vibrant colors. I hope you like decorations and feel free to comment about anything you see. It's great to blog again.
Craftycorner's: I was on hiatus for the summer.....
Craftycorner's: I was on hiatus for the summer.....: I took a loong break during the summer and now I am so ready and eager to do my favorite crafts for fall. I already started som...
I was on hiatus for the summer.....
I took a loong break during the summer and now I am so ready and eager to do my favorite crafts for fall. I already started some autumn crafts and I for one am so glad that summer will be over soon,
I don't know about anybody else but this summer was a scorcher in the midwest. Reading news stories I think that 80% of the country had experienced the hottest temperatures ever for a season. I am looking for cooler weather and everything that fall brings. So....I have busy the last week decorating my small apartment. Wherever you look the warm colors are apparent; red, oranges, gold, green and brown. I feel warm inside too looking at the vibrant colors. I hope you like decorations and feel free to comment about anything you see. It's great to blog again.
Labels:
autumn,
centerpiece,
colors,
crafts,
festive,
glitter,
potpourri,
pumpkins,
stems,
tea lights,
vase,
wall,
wreath
Friday, May 20, 2011
Craftycorner's: My Spice Rack
Craftycorner's: My Spice Rack: "I needed a spice rack desperately with the spices I have, the top of my stove didn't have a square inch left. I thought with all my car..."
My Spice Rack
I needed a spice rack desperately with the spices I have, the top of my stove didn't have a square inch left. I thought with all my cardboard I keep and the corrugated cardboard is very sturdy for alot of crafts. Whenever I get small appliances I fold the boxes and store them.
This was a 8 plus hour project with all measuring, cutting, painting.....well you can imagine. The cardboard strips were all different sizes. My kitchen is red and black so I sponge painted red in some places and painted plain red on the front strips. Believe it or not, I still have more spices in my cupboard but for now I will enjoy my spice rack and whenever I cook, all I have to do is pick up my spice rack and put it on my counter and use my spices.
====================
Subscribe to:
Comments (Atom)


